Introduction
Before ordering custom stoppers, every spirits brand should confirm the bottle neck diameter. A closure may look correct in a product mockup, but the real fit depends on the inner neck bore, stopper shank diameter, insertion depth, glass tolerance, and closure material.
For distilleries, private label buyers, importers, distributors, bottlers, and packaging procurement teams, this check helps prevent leakage, loose fit, excessive insertion force, uneven seating height, and delayed production approval.
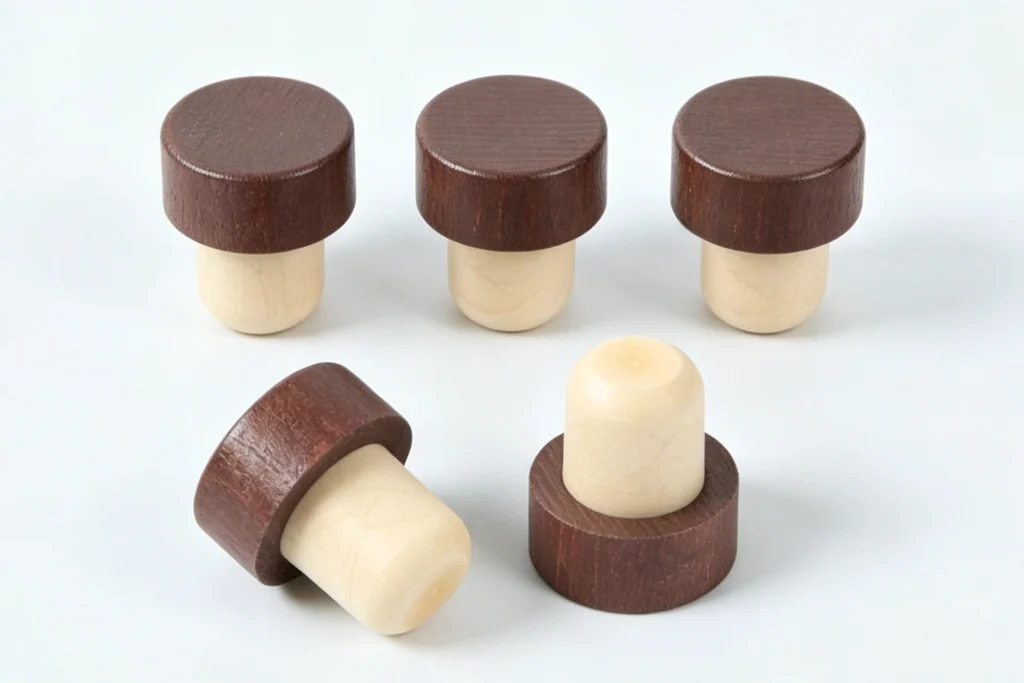
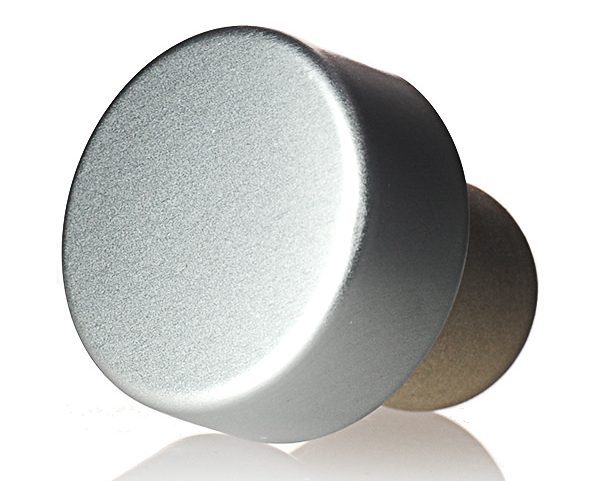
Kandacork Closures helps spirits brands develop custom cork, synthetic, T-top, and bar-top closures that fit both the bottle and the brand presentation. Buyers comparing consistent shank performance and repeatable bottle fit can start with custom synthetic bar-top stoppers when evaluating stopper material options for spirits bottles.
Quick Answer
To confirm bottle neck diameter before stopper sampling, measure the inner neck bore, verify the I dimension from the bottle drawing, check neck depth, measure several physical bottles, record minimum and maximum readings, and send the data to the stopper supplier before requesting samples.
Do not rely only on bottle volume, product photos, or outside neck finish. For cork stoppers, synthetic stoppers, and bar-top closures, the stopper shank seals inside the bottle. The internal bottle neck diameter is the critical measurement.
Need stopper samples? Send Kandacork Closures your bottle drawing, inner neck diameter, neck depth, target stopper style, and 3–5 physical bottles for fit review.
Why Bottle Neck Diameter Matters for Stopper Sampling
Bottle neck diameter controls how the stopper shank contacts the glass. If the shank is too small, the closure may feel loose or leak during storage and shipping. If the shank is too large, it may be difficult to insert, hard to remove, or inconsistent during bottling.
For premium spirits packaging, fit is both technical and emotional. A whisky stopper should feel secure. A rum stopper should sit straight. A gin closure should support the visual identity of the brand. A private label spirits buyer needs repeatable performance across bulk production, not just one acceptable sample.
Poor neck confirmation can cause:
- Loose fit or leakage
- Excessive insertion force or difficult opening
- Uneven stopper seating height
- Inconsistent pull-out feel
- Delayed sampling, quotation, or production approval
A stopper is not a standalone part. It works with the bottle neck, filling method, shipping route, storage conditions, and brand positioning. That is why confirming bottle neck diameter before stopper sampling should be part of every serious spirits packaging project.
Inner Neck Diameter vs. Neck Finish
Bottle neck diameter and neck finish are related, but they are not the same.
The neck finish usually refers to the external structure of the bottle neck. It may include thread diameter, finish height, sealing surface, and dimensions used for screw caps, ROPP caps, or continuous-thread closures.
The inner neck diameter, also called the bottle bore or I dimension, refers to the internal opening where the stopper shank enters the bottle. For T-top corks, bar-top closures, and synthetic stopper shanks, this internal measurement is usually the most important factor.
Industry packaging references commonly explain dimensions such as T, E, I, S, and H. These terms are useful, but buyers should know which dimension matters for their closure type.
| Dimension | Meaning | Relevance to Stopper Sampling |
|---|---|---|
| T dimension | Outside thread or finish diameter | Important for threaded caps and screw closures |
| E dimension | Outside neck diameter excluding thread | Helps define outside neck geometry |
| I dimension | Inside neck diameter or bore | Critical for stopper shank fit |
| S dimension | Thread start or orientation reference | Mainly relevant to threaded closures |
| H dimension | Finish height | Affects closure height, seating, and cap compatibility |
For stopper sampling, the I dimension and real internal bore profile matter more than the outside appearance. A bottle can have a standard-looking finish but a slightly different internal neck diameter. That small difference can change the recommended stopper shank size. Buyers working with bar-top closures can also review how bar-top stoppers fit spirits bottle necks to understand shank diameter, compression, insertion depth, and pull-out behavior in more detail.
Bottle Neck Measurement Diagram for Stopper Sampling

Key bottle neck measurements before stopper sampling: I dimension, neck depth, stopper shank diameter, cap top seating height, and compression zone.
This diagram should show the difference between the outside neck finish and the internal bottle bore. It should also mark where the stopper shank enters the bottle and where compression occurs. For image SEO, use a compressed WebP file and include descriptive alt text such as: “Bottle neck diameter measurement diagram for stopper sampling.”
Key Measurements Before Sampling
Before requesting stopper samples, confirm the measurements that affect sealing, insertion, appearance, and production repeatability.
| Measurement | What to Check | Why It Matters |
|---|---|---|
| Inner neck diameter | Internal bottle opening in millimeters | Determines stopper shank fit |
| Neck depth | Available insertion depth | Affects shank length and seating height |
| Bore profile | Straight, tapered, narrow, or irregular bore | Helps identify hidden fit risks |
| Ovality | Whether the inner neck is perfectly round | Affects compression and pull-out feel |
| Finish type | Bar-top, cork finish, ROPP, CT, or custom | Determines closure structure |
| Glass tolerance | Variation between bottles or batches | Protects bulk production consistency |
The most important point is to measure real bottles, not only the drawing. Bottle drawings provide a useful technical reference, but production bottles may vary slightly depending on mold, batch, and supplier conditions.
The Glass Packaging Institute is a useful industry entity for understanding glass packaging as a material category, but final stopper fit should always be confirmed with actual bottle samples.
How to Measure Bottle Neck Diameter Before Stopper Sampling
Check the Bottle Drawing
Start with the bottle technical drawing. Ask the bottle supplier for a drawing that includes inner neck diameter, neck depth, finish type, finish height, and tolerance range.
The drawing gives the stopper supplier a technical starting point. It helps confirm whether the bottle is suitable for a standard stopper range or requires custom sampling.
Measure Real Bottle Samples
Use actual bottles whenever possible. For new packaging development, use pre-production bottles from the intended mold. For an existing spirits product, use current production bottles from the same supplier and bottle batch used for filling.
A digital caliper can help measure the opening. For deeper bore measurement, proper bore gauges or supplier-side measuring tools may be more reliable.
Measure More Than One Bottle
One bottle is not enough for reliable stopper sampling. A single bottle may not represent the full tolerance range.
Measure several bottles from the same batch. If possible, measure bottles from different batches as well. This helps the supplier understand the minimum, maximum, and average bottle neck diameter.
Measure at More Than One Depth
Do not measure only the top lip. The stopper shank enters the bottle and contacts the internal neck below the mouth.
Measure at the opening and slightly deeper inside the bore if tools allow. This can reveal taper, pinch points, or inconsistent internal geometry. Technical fit-focused suppliers often review multiple sample bottles and check internal neck variation rather than relying on one catalog size.
Record the Results Clearly
A useful measurement report should include:
- Smallest inner neck diameter
- Largest inner neck diameter
- Average inner neck diameter
- Measurement depth
- Number of bottles measured
- Bottle supplier
- Mold number, if available
- Production batch information, if available
Clear data helps the closure supplier recommend a safer shank size range and reduce unnecessary sample rounds.
Stopper Sampling Data Sheet
Before requesting samples, prepare a simple data sheet. This helps the supplier move faster from technical review to sampling and quotation.
| Required Data | Buyer Input | Why It Matters |
|---|---|---|
| Bottle capacity | 500ml, 700ml, 750ml, 1L, custom | Helps identify bottle format |
| Inner neck diameter | mm | Determines stopper shank fit |
| Neck depth | mm | Affects insertion and seating height |
| Bore variation | Min / max / average | Reduces leakage and tight-fit risk |
| Finish type | Bar-top, cork finish, ROPP, CT, custom | Defines closure structure |
| Bottle drawing | PDF, CAD, or supplier drawing | Gives technical reference |
| Physical bottles | 3–5 bottles recommended | Allows real fit testing |
| Spirit type | Whisky, rum, gin, tequila, vodka, etc. | Helps material and design selection |
| ABV | % alcohol by volume | Supports compatibility review |
| Filling method | Manual, semi-auto, automatic | Affects insertion force requirements |
| Stopper material | Natural cork, synthetic, micro-agglomerated | Affects compression and pull-out feel |
| Cap top material | Wood, metal, plastic, ceramic, composite | Affects visual and cost direction |
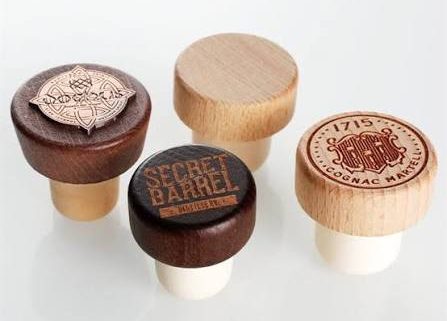
| Decoration | Engraving, embossing, printing, medallion | Supports branding review |
| Target quantity | Units or annual volume | Helps quotation and production planning |
| Launch timeline | Date or project stage | Helps sampling schedule |
This data sheet is especially useful for private label buyers, importers, and distributors who need to compare closure suppliers quickly.
Not sure which shank size to sample? Send your bottle drawing, measured inner bore, neck depth, and 3–5 bottles to Kandacork Closures for a fit review before quotation.
Why the 1mm Shank Rule Is Only a Starting Point
Many stopper fit guides mention a basic rule: the stopper shank is often slightly larger than the bottle opening. In some bar-top closure guides, buyers may see a recommendation close to “about 1mm larger than the bottle neck opening.”
This rule is useful for early estimation, but it should not be treated as a final production specification.
The correct stopper shank depends on inner bottle neck diameter, bore profile, neck depth, glass tolerance, stopper material, shank hardness, surface texture, compression recovery, desired pull-out force, filling-line insertion method, and shipping conditions.
Natural cork, synthetic cork, and micro-agglomerated cork do not behave exactly the same way. The best approach is to use the 1mm rule as a first reference, then confirm the final size with real bottle samples, insertion testing, pull-out testing, and leakage review.
When the 1mm Rule May Fail
| Situation | Why the 1mm Rule May Fail | What to Do |
|---|---|---|
| Custom glass mold | Internal bore may not match catalog size | Send bottle drawing and real samples |
| Narrow point below lip | Stopper may feel too tight after insertion | Measure at multiple depths |
| Oval neck bore | Compression may be uneven | Test several bottles |
| Different stopper materials | Cork and synthetic shanks compress differently | Compare trial samples |
| Export shipping | Vibration and temperature changes may affect seal | Add leakage and handling tests |
| Automatic filling line | Insertion force may need tighter control | Test with production conditions |
| New bottle supplier | Neck tolerance may change | Reconfirm fit before bulk order |
If the bore is custom, irregular, or inconsistent, request fit samples before bulk quotation. For broader packaging projects where bottle shape, stopper fit, and glass supply need to be reviewed together, buyers can also coordinate the bottle side through Kandacork Glass spirits packaging support.
Material Fit Comparison
Different stopper materials compress and recover differently. This affects fit, sealing, opening feel, and bulk production consistency.
| Stopper Material | Fit Behavior | Best Use |
|---|---|---|
| Natural cork | Traditional feel, natural elasticity, possible material variation | Premium, craft, heritage-style spirits |
| Synthetic stopper | More controlled dimensions and consistent compression | Private label, high-volume, color-customized projects |
| Micro-agglomerated cork | Cork-based appearance with more uniform structure | Brands needing cork identity with better consistency |
When comparing materials, buyers should evaluate compression behavior, recovery after insertion, pull-out feel, alcohol compatibility, odor control, visual style, sustainability expectations, cost, MOQ, and bulk production stability.
Stopper Sample Testing SOP
After receiving stopper samples, test both technical fit and brand presentation. A stopper that fits one bottle once is not enough for bulk approval.
| Test | Method | Pass / Fail Signal |
|---|---|---|
| Insertion test | Insert stopper into 3–5 bottles | Smooth insertion without excessive force |
| Seating height check | View from front, side, and top | Cap sits level and repeatable |
| Pull-out feel test | Open by hand repeatedly | Secure but removable |
| Leakage test | Test upright, tilted, and inverted | No visible leakage |
| Handling simulation | Shake or apply transport-style movement | Stopper remains stable |
| Decoration review | Check logo, top material, surface, and color | Consistent brand appearance |
For export projects, buyers may add vibration, temperature-change, and longer storage checks. Leakage can be affected by neck diameter, shank material, filling volume, headspace, shipping method, and storage environment.
Common Mistakes to Avoid
The most common mistake is measuring only the outside neck diameter. For stopper sampling, the inner bottle neck diameter is usually more important.
Another mistake is assuming all 700ml or 750ml spirits bottles use the same stopper. Bottle capacity does not guarantee the same neck bore.
Buyers should also avoid choosing stopper size from a chart only. A chart can help estimate a starting point, but final approval should use real bottles.
Other mistakes include ignoring neck depth, testing only one bottle, measuring only at the top lip, ignoring bore taper, changing bottle supplier after stopper approval, approving samples without leakage testing, and focusing only on cap-top design.
For a smoother project, confirm the bottle first, then confirm the closure. If the project involves glass-top formats, review the related guide on glass stopper neck finish matching before approving samples.
How to Evaluate a Stopper Supplier Before Sampling
A reliable stopper supplier should do more than send random samples. For spirits packaging, the supplier should understand both technical fit and brand presentation.
| Supplier Capability | Why It Matters |
|---|---|
| Can read bottle drawings | Reduces technical misunderstanding |
| Understands I dimension and inner bore | Improves stopper fit accuracy |
| Reviews neck depth | Helps avoid seating and insertion problems |
| Recommends trial shank sizes | Reduces sample rounds |
| Supports multiple shank materials | Helps compare cork and synthetic options |
| Offers custom cap-top materials | Supports brand differentiation |
| Provides decoration options | Helps evaluate logo and premium finish |
| Understands filling-line requirements | Improves production compatibility |
| Supports leakage and pull-out review | Reduces launch risk |
| Maintains dimensional consistency | Protects bulk production quality |
| Communicates clearly before quotation | Saves procurement time |
A technically capable supplier can help buyers move from bottle drawing to sample approval faster. This is important for distilleries, private label programs, importers, and distributors working under launch deadlines.
When to Request a Quotation
A quotation is most accurate after the main technical and visual requirements are clear.
You are ready to request a quotation when you have confirmed bottle neck diameter, confirmed neck depth, shared the bottle drawing, prepared physical bottles, selected the stopper type, selected the target shank material, selected the cap-top material, confirmed the decoration method, estimated the order quantity, and shared the launch timeline.
If your bottle has a custom bore or non-standard neck profile, request stopper sampling before confirming bulk order pricing. This avoids quoting a closure that may later need technical changes.
How Kandacork Closures Supports Stopper Sampling
Kandacork Closures helps spirits packaging buyers connect technical closure fit with premium brand presentation.
A typical support workflow includes reviewing the bottle drawing, checking inner bottle neck diameter, confirming neck depth and insertion area, reviewing physical bottle samples, recommending stopper shank options, comparing natural cork and synthetic materials, supporting cap-top selection, preparing samples, and helping evaluate fit before bulk production.
For brands comparing multiple cap and stopper formats, Kandacork Closures also provides custom spirits bottle closure and stopper support across material selection, neck compatibility, sample approval, branding, and bulk supply. The goal is to help buyers approve a closure that fits the bottle, supports the brand image, and can be reproduced consistently in bulk.
Contact Kandacork Closures for custom stopper sampling, closure material comparison, and quotation support for spirits bottle projects.
FAQ
What is bottle neck diameter?
Bottle neck diameter can refer to the bottle opening, outside neck finish, or inner bore depending on context. For stopper sampling, the most important measurement is the inner bottle neck diameter where the stopper shank enters and seals.
Is bottle neck diameter the same as neck finish?
No. Neck finish usually describes the external bottle neck structure, such as thread diameter and finish height. Stopper fit depends mainly on the inner neck bore, neck depth, and stopper shank compression.
How do I measure inner neck diameter?
Use a bottle drawing as the technical reference, then measure real bottle samples with suitable measuring tools. Record the minimum, maximum, and average inner neck diameter in millimeters.
Should the stopper shank be larger than the bottle opening?
Usually, the stopper shank is slightly larger than the inner bottle neck diameter to create compression. However, the final size depends on material, hardness, bore profile, neck depth, and target pull-out feel.
Can I choose stopper size from a chart only?
A chart can help estimate a starting size, but final stopper approval should be based on real bottle samples, insertion testing, pull-out feel, seating height, and leakage review.
How many bottle samples should I send?
Send several bottles whenever possible. For serious spirits stopper sampling, 3–5 bottles are recommended because they help the supplier check tolerance variation, roundness, and fit consistency.