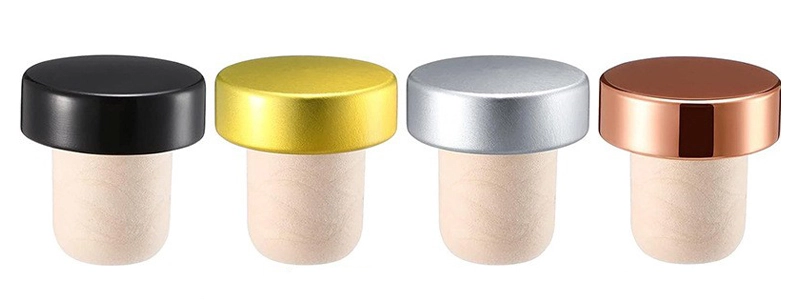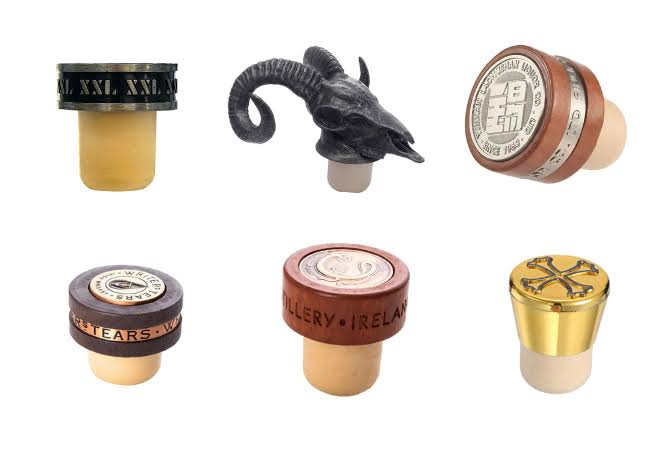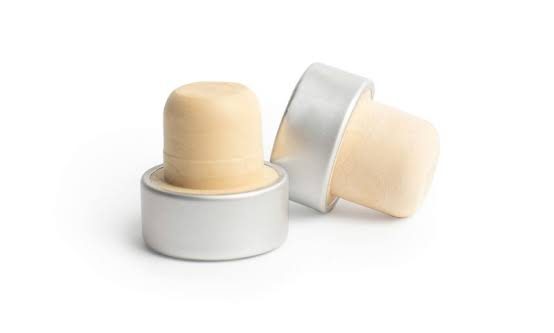
Shrink sleeves usually do not sit evenly because the sleeve dimensions are incorrect, the bottle or closure is not level, or heat reaches one area before the rest of the film. Before changing tunnel temperature, check the lay-flat width, cut height, installed closure, initial sleeve position, and heat distribution.
For spirits brands, an uneven shrink band or capsule is more than a cosmetic defect. It can make a premium whisky, vodka, gin, rum, tequila, or liqueur bottle look poorly assembled.
Uneven shrinkage may also:
- Move the seam or perforation;
- Reduce lower-neck coverage;
- Interfere with opening;
- Expose glass or closure variation;
- Create inconsistent tamper evidence.
The bottle, closure, shrink sleeve, and application process must be evaluated together. Additional heat cannot correct an oversized sleeve, an oval bottle neck, or a bar-top stopper installed at an angle.
Buyers developing a new neck finish can compare Kandacork’s capsules and shrink sleeves for spirits bottles before selecting the sleeve material, size, perforation, and application method.
Quick Diagnosis: What Does the Defect Look Like?
Identify the visible symptom before replacing the film or changing several machine settings.
| Visible symptom | Most likely causes | How to confirm it | First corrective action |
|---|---|---|---|
| One side sits higher | Tilted closure, off-center placement, uneven heat | Measure the closure and sleeve-edge height at four points | Level the closure and check heat symmetry |
| Bottom edge is wavy | Sleeve too wide or too long | Measure lay-flat width and cut height | Review sleeve dimensions |
| Sleeve moves upward | Tapered neck, weak lower grip, excessive upper heat | Mark the lower edge before heating | Increase lower-neck engagement |
| Wrinkles form below the cap | Excess film or abrupt diameter transition | Compare closure and neck circumferences | Resize the sleeve or revise the shrink sequence |
| Top edge curls or melts | Concentrated or excessive heat | Inspect the first area exposed to heat | Reduce local heat intensity |
| Seam rotates toward the front | Poor orientation or unequal shrink force | Mark the seam before heating | Improve placement and tunnel balance |
| Only some bottles are defective | Glass, closure, contamination, or placement variation | Compare bottles and closures from several lots | Test across production tolerances |
| Every bottle leans the same way | Applicator, guide, conveyor, or tunnel imbalance | Run marked bottles through the line | Recenter the package path |
For a deeper review of film dimensions, lower-neck anchoring, perforations, and visible opening evidence, see the tamper-evident sleeve fit and sizing guide.
Three Fixes to Avoid Before Finding the Root Cause
1. Do not immediately increase tunnel temperature
More heat may worsen sleeve rising, edge curling, closure deformation, print distortion, or uneven anchoring.
Adjust temperature only after confirming that the sleeve dimensions, closure position, bottle alignment, and heat distribution are suitable.
2. Do not order a tighter sleeve without measuring the package
Reducing lay-flat width may appear to be a quick solution for wrinkles. However, an undersized sleeve can resist application, split at the seam, distort the perforation, or place excessive stress on a plastic closure.
Measure the complete bottle–closure profile before revising the specification.
3. Do not approve production from one hand-applied sample
A heat-gun sample may support an early visual review, but it does not represent:
- Bottle and closure tolerances;
- Applicator timing;
- Conveyor movement;
- Production line speed;
- Tunnel balance;
- Batch-to-batch material variation.
Final approval should use representative bottles, installed closures, production-intent film, and the intended heating process.
Is the Problem the Sleeve, Bottle, Closure, or Heat?
Use the following sequence to isolate the source.
Is the closure level before heating?
If not, inspect stopper insertion, capping-head alignment, top load, thread engagement, and bottle stability.
Is the sleeve level before heating?
If not, inspect manual placement, applicator timing, mandrel alignment, and cut-length consistency.
Does the defect always appear on the same side?
If yes, prioritize conveyor centering, guide rails, airflow, steam outlets, heating elements, and external drafts.
Does the defect appear randomly?
If yes, inspect glass tolerances, installed closure height, contamination, sleeve dimensions, and component-lot variation.
Did the problem begin after a material change?
Compare the film grade, thickness, shrink behavior, ink, coating, seam construction, manufacturing source, and storage history.
Use a controlled rotation test
Where the equipment permits, rotate the bottle 180 degrees and repeat the test without changing other variables.
If the defect remains on the same side of the machine, investigate the applicator, guides, airflow, steam, or tunnel balance.
If the defect rotates with the bottle, investigate bottle geometry, closure installation, sleeve placement, or component variation.
Projects involving uncertain neck dimensions, stopper fit, ROPP forming, or sleeve coverage can use Kandacork’s bottle-neck compatibility and closure fit testing service before bulk production.
1. Incorrect Lay-Flat Width or Cut Height
Lay-flat width is the width of the tubular sleeve measured while it is lying flat before application. It is not the same as the bottle or closure diameter.
The sleeve must clear the widest part of the package before shrinking while retaining enough available shrink to conform to the smaller bottle-neck diameter.
What happens when the sleeve is too wide?
An oversized sleeve can produce:
- Vertical wrinkles;
- Diagonal folds;
- A wavy lower edge;
- Loose areas around the bottle neck;
- Unstable seam orientation;
- Uneven material gathering below the closure.
What happens when the sleeve is too narrow?
An undersized sleeve may be difficult to place over the closure. It can split at the seam, tear at the perforation, distort printed graphics, or place excessive stress on the cap.
The widest part of the covered package may be:
- A wooden or synthetic stopper head;
- A flared closure skirt;
- A glass transfer ring;
- A decorative collar;
- A tamper-evident band;
- A molded bottle feature.
Cut height is equally important. A short shrink band may not extend far enough below the closure to establish a stable grip. An overly long capsule may gather near the shoulder or interfere with the primary bottle label.
For bar-top stoppers, determine the sleeve height from the installed closure height, including the expected insertion tolerance, rather than from the stopper drawing alone. Kandacork’s guide to how bar-top stoppers fit spirits bottle necks explains how neck bore, shank dimensions, insertion depth, and capsule clearance work together.
2. Bottle-Neck Geometry and Glass Tolerances
Glass bottles are manufactured within dimensional tolerances. Small variations become more visible when thin film shrinks tightly around the neck.
Neck ovality
A slightly oval neck allows the film to contact two sides before the other two. These first contact points can become uneven anchors, producing wrinkles or an angled lower edge.
Tapered bottle necks
Film may move toward a smaller diameter as it shrinks. On a smooth, tapered neck, the sleeve can rise unless it extends below a bead, ridge, or another suitable lock point.
Transfer rings and molded details
Transfer rings and decorative beads may stabilize the sleeve, but abrupt diameter changes can also cause material gathering.
Mold seams, ribs, embossing, and asymmetric bottle shapes affect how the film contacts the glass.
Bottle stability
Tall, lightweight, miniature, or irregular spirits bottles may wobble as they pass through the applicator and shrink tunnel.
A container puck or dedicated support fixture may be required to maintain a repeatable height and orientation. The support must stabilize the bottle without blocking the section that needs heat.
Use physical production bottles for final validation. A nominal drawing may not fully represent neck ovality, bottle stability, mold details, surface treatment, or cavity-to-cavity variation. For projects in which the bottle structure is still being developed, Kandacork Spirits can support custom bottle design and neck-finish planning alongside closure and sleeve selection.
3. Tilted or Inconsistently Installed Closures
When one edge of a shrink sleeve sits higher, inspect the closure before changing the tunnel.
| Closure type | First variable to check | Common sleeve symptom |
|---|---|---|
| Bar-top stopper | Insertion depth and head level | One edge sits higher |
| Synthetic T-stopper | Shank fit and head concentricity | Wrinkles below the head |
| ROPP closure | Capping-head alignment and skirt height | Crooked lower edge |
| Screw cap | Thread engagement and top load | Uneven band coverage |
| Cork with capsule | Cork position and bottle-neck taper | Capsule rises or gathers |
Bar-top and T-stoppers
A bar-top stopper may be tilted because of:
- Unequal insertion depth;
- Bottle-bore variation;
- Incorrect pressing alignment;
- Stopper-head or shank tolerances.
A shrink capsule follows the installed stopper profile. It cannot visually correct a closure that is already significantly angled.
ROPP and screw-cap closures
Roll-on pilfer-proof and continuous-thread closures may sit unevenly because of incorrect thread engagement, capping-head alignment, variable top load, or bottle wobble.
How to confirm the problem
Place the bottle on a level surface. Measure from a fixed bottle reference to the closure top at four points around the circumference.
Repeat the measurement on several bottles. If the closure is uneven before the sleeve is applied, correct the closure process first.
4. Incorrect Sleeve Placement
A correctly sized sleeve can finish crooked if it enters the heat zone at the wrong height or angle.
Common manual-application problems include:
- Uneven initial placement;
- A trapped fold;
- Inconsistent seam orientation;
- Different operator reference points;
- Airflow moving the sleeve before it grips.
On an automated line, check:
- Sleeve-release timing;
- Mandrel alignment;
- Bottle centering;
- Guide-rail position;
- Container stability;
- Sleeve-feed and conveyor synchronization.
Mark the seam and lower edge before running a trial. If the reference marks are already uneven before heating, the problem originates in application rather than film shrinkage.
5. Uneven Heat and Tunnel Balance
Uneven heat is a frequent cause of crooked, wrinkled, or rising shrink sleeves.
The first area to receive sufficient heat begins contracting and gripping the package. If one side anchors early, the remaining film may pull toward it.
Manual heat-gun application
Heat-gun results can vary with:
- Distance from the package;
- Nozzle angle;
- Starting position;
- Bottle-rotation speed;
- Exposure time.
Apply moderate heat while rotating the bottle continuously. Avoid completing one side before heating the opposite side.
Hot-air shrink tunnels
Inspect:
- Zone temperature;
- Air velocity;
- Nozzle direction;
- Heating-element condition;
- Fan operation;
- Conveyor speed;
- Container position.
A defect that consistently appears on one side may indicate a blocked nozzle, failed heating element, incorrect fan direction, external draft, or off-center bottle path.
Steam tunnels
For steam systems, check:
- Pipe alignment;
- Blocked steam holes;
- Valve settings;
- Pressure consistency;
- Condensation;
- Exhaust balance.
A localized cold area can leave one section loose while the opposite side contracts.
Production line speed
Conveyor speed determines heat exposure. A faster line reduces dwell time, while a slower line increases it.
When production speed changes, validate the applicator, bottle-control system, tunnel, and downstream handling together.
6. Film, Print, Seam, or Perforation Behavior
Shrink performance depends on the film grade, thickness, shrink curve, shrink force, printing, seam construction, and processing history.
Film properties to control
A sleeve specification should identify:
- Film family and grade;
- Thickness and tolerance;
- Shrink direction;
- Available shrink percentage;
- Surface treatment;
- Approved supplier or equivalent;
- Storage requirements.
The ASTM D2732 thermal shrinkage test method provides a standardized approach for measuring the unrestrained linear thermal shrinkage of plastic film at selected temperatures. Laboratory testing can support material comparison and lot control, but it does not replace trials on the actual bottle and installed closure.
Print and decorative effects
Heavy ink coverage, coatings, metallic effects, and varnishes may alter local film behavior or make distortion more visible.
Straight borders, fine text, centered logos, and geometric graphics reveal small application errors. Critical artwork should be distortion-compensated and tested on the production-intent package.
Seam and perforation
The seam should remain in the approved presentation area after shrinking. It should not rotate toward the front-facing panel.
Perforations and tear tabs must remain aligned with the intended opening point. Excessive movement may indicate poor initial orientation, unequal heat, unsuitable dimensions, or unbalanced shrinkage.
Brands still deciding between a decorative capsule, printed sleeve, or simple tamper-evident band can review the comparison of capsules versus shrink sleeves for spirits packaging.
Buyer note for clear sleeves
Clear film can reveal glass scuffs, trapped moisture, seam lines, surface-treatment variation, and uneven contact that an opaque or heavily printed sleeve may hide.
Approve clear sleeves on filled and capped production bottles under representative retail lighting, not only on empty laboratory samples.
7. Storage, Contamination, and Process Variation
Water, spirits, syrup, oil, dust, or other residue can change the friction between the sleeve and the package. The film may slide before anchoring, or contamination may remain visible beneath clear material.
Inspect filling and capping areas for product splash, rinsing residue, dust, and neck-treatment variation.
Store film in its original protective packaging and follow the material supplier’s documented requirements. Excessive heat, sunlight, humidity, or pressure can affect dimensions, blocking, handling, and appearance.
A change in film supplier, grade, thickness, ink, coating, seam adhesive, or manufacturing site may require renewed validation even when the purchasing description appears unchanged.
Require written notification before any material or process change that could affect shrink performance.
A Practical Shrink Sleeve Troubleshooting and Validation Process
Use a controlled process and change one variable per trial.
Step 1: Collect the package components
Provide:
- Bottle drawings and physical bottles;
- Production-intent closures or stoppers;
- Installed closure-height range;
- Sleeve artwork and coverage requirements;
- Intended heating method.
Step 2: Inspect the bottle and closure
Check bottle stability, neck ovality, stopper insertion, closure angle, installed height, and surface cleanliness.
Step 3: Measure the sleeve
Verify:
- Lay-flat width;
- Cut height;
- Film thickness;
- Seam position;
- Perforation position;
- Print registration.
Step 4: Mark the starting position
Mark the seam and lower edge before heating. These references show whether the sleeve began incorrectly or moved during shrinking.
Step 5: Test the intended production method
Use the intended hot-air, steam, localized heating, or manual process as closely as possible. Hold other variables constant.
Step 6: Evaluate production tolerances
Test several bottles and closures. Where possible, include minimum, nominal, and maximum installed closure heights.
Step 7: Define acceptance criteria
Record:
- Permitted edge-height difference;
- Acceptable wrinkle level;
- Seam location;
- Print position;
- Required lower-neck coverage;
- Perforation and opening performance.
Use measurable project criteria rather than a general request for a “perfect” finish.
Step 8: Approve a golden sample
Retain the approved sample, artwork, dimensions, material information, process settings, and approval date for production reference.
Heat Gun vs. Hot-Air Tunnel vs. Steam Tunnel
| Method | Best suited for | Repeatability | Main risk | Validation requirement |
|---|---|---|---|---|
| Heat gun | Prototypes and small runs | Operator-dependent | Uneven distance and exposure | Standardize rotation and heating sequence |
| Hot-air tunnel | Repeat production | High when controlled | Hot spots and dwell-time mismatch | Validate airflow, speed, and bottle position |
| Steam tunnel | Complex contours | High when balanced | Condensation and steam imbalance | Validate pressure, outlets, and exhaust |
| Localized neck heater | Narrow neck bands | High for defined packages | Local overheating | Confirm heater and bottle alignment |
How to Evaluate a Shrink Sleeve and Closure Supplier
| Supplier capability | Evidence to request | Key question |
|---|---|---|
| Dimensional engineering | Controlled drawing and tolerances | Were actual bottles measured? |
| Closure compatibility | Tests using installed closures | Was the full installed-height range evaluated? |
| Material control | Film grade, thickness, and shrink data | Will material changes require reapproval? |
| Application support | Sample or trial record | Was the intended heating process used? |
| Print control | Artwork, seam, and registration standards | How is seam movement controlled? |
| Quality management | Inspection plan and lot traceability | Which dimensions are checked by lot? |
| Change control | Written notification procedure | Which changes trigger a new sample? |
A capable supplier should evaluate the installed bottle–closure package rather than recommend a sleeve from nominal cap diameter alone.
What to Include in a Sample or RFQ Request
Provide:
- Bottle drawings and physical samples;
- Neck-finish, bore, and maximum-circumference dimensions;
- Closure or stopper specification;
- Installed closure-height tolerance;
- Required sleeve coverage;
- Film material, thickness, color, and printing;
- Seam, perforation, and opening requirements;
- Application equipment and target line speed;
- Initial quantity and estimated annual demand;
- Destination market, documentation, and launch date.
When Should the Sleeve Be Redesigned?
Redesign may be more effective than continued machine adjustment when:
- Lay-flat width is outside a practical range;
- The sleeve cannot grip below the closure;
- Available shrink is insufficient for the diameter transition;
- Closure-height variation exceeds the design allowance;
- The seam consistently rotates into the front panel;
- The perforation moves away from the opening point;
- Graphics remain distorted under stable settings;
- Heat damages the closure or bottle decoration.
Alternatives may include a resized band, a different film grade, a decorative capsule, a pressure-sensitive neck label, an integrated tamper-evident closure, or a modified stopper profile.
Frequently Asked Questions
Why does a shrink sleeve sit higher on one side?
A shrink sleeve usually sits higher on one side because the closure is tilted, the sleeve was placed off center, the bottle entered the tunnel at an angle, or one side received heat first. Inspect the unsleeved closure and initial sleeve position before adjusting the tunnel.
Why does a shrink band move upward when heated?
A shrink band may rise when the bottle neck is tapered, the lower edge does not extend far enough below the closure, or excessive heat is concentrated near the top. More lower-neck engagement or a revised shrink sequence may improve stability.
Can a shrink sleeve be too large?
Yes. Excessive lay-flat width leaves surplus film that may form wrinkles, waves, or an unstable seam. The sleeve should clear the widest component without being unnecessarily loose.
Should a shrink band be heated from the top or bottom first?
There is no universal sequence. The correct method depends on bottle geometry, closure design, film behavior, and equipment. The objective is to establish a controlled anchor without pulling the sleeve upward or trapping excess material.
Why are only some bottles in a batch uneven?
Random defects often indicate glass or closure tolerances, inconsistent stopper insertion, contamination, placement variation, or bottle instability. Compare samples from several cartons, production lots, or bottle cavities.
Should the supplier receive physical bottle samples?
Yes. Physical samples reveal actual glass tolerances, surface features, bottle stability, installed closure height, and application clearance that nominal drawings may not fully represent.